-
Take shades and photos with year-round, full-spectrum light
What we perceive as color depends on which wavelengths of visible light are reflected by a given material and how much of the visible light spectrum is emitted by the light source. When creating an optimal shade-taking environment, it is best to have a combination of natural and electric light. Natural light on a sunny day is best for shade-taking, but direct sunlight can be so intense that it overpowers our eyes. Also, on cloudy days or during winter, natural light can be inadequate to get the right shade. For the best year-round shade-taking environment, augment the natural light from the windows with color corrected electric light. Many bulbs are marketed as "daylight" bulbs, but critical shade-taking consideration is the bulb's Color Rendering Index (CRI). This refers to the percentage of the visible light spectrum emitted by the bulb. You will get the best shade-taking results with bulbs over 90 CRI. The higher the CRI, the better.

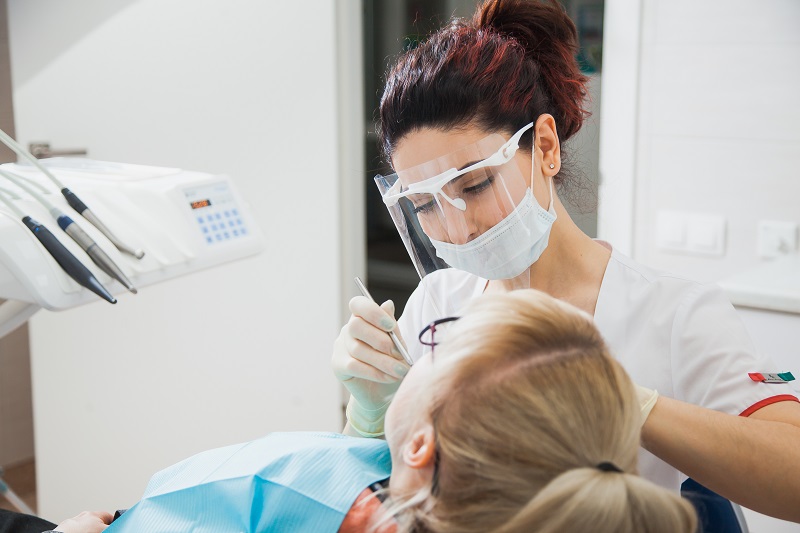
Be careful of operative lights, even color-corrected operative lights. They can sometimes be so intense that they “wash out” the details of the shade, and they can even make a tooth appear deceptively higher in value (lighter).
-
Take shades in a neutral shade environment
The light used for shade-taking comes from windows and bulbs and the room's surfaces. As such, it is good to use a room with neutral, light-colored walls. Also, a neutral gray or light blue patient bib will have less effect on shade perception. It is good practice to ask patients to remove lipstick to eliminate distracting colors when taking a shade.
-
Understand your patient’s shade expectations and share any challenges before shade-taking
Often, shade problems can occur when we do not clearly understand the patient’s shade expectations. For instance, we often match the contralateral tooth or teeth when restoring one or two anterior teeth. However, the patient may not want this, as it might accentuate teeth that they find less attractive. In those cases, it is often best to match a tooth or teeth in a way that will optimize the patient’s smile while explaining the potential shade asymmetries in such a plan. For smile design cases, we need to help the patient visualize the potential result of different shades. Patients may say, “You’re the expert,” but they often have a vision of their smile, and it’s in our best interest to understand that information.
Most people want their smile to look as light as possible, yet they often have slight variations in shade from one tooth to the next. Showing these details builds your shade-taking credibility and increases patient involvement in and acceptance of the proposed treatment. If patients are disappointed with the shade selected, this is a great opportunity to present cosmetic treatment options. If bleaching is chosen, be sure to allow some time after bleaching is complete before choosing the final shade for your restoration, even if the patient must wear a temporary restoration for an extended period.
-
Take shades before treatment, while teeth are still hydrated
Often, shades are selected at the end of treatment. However, the teeth are often dehydrated and a little lighter than normal by this time.The best time to take a shade is before treatment. One practical approach can be taking the shade at the time that a restorative patient is first seated. That way, the patient is rested, and the teeth are fully hydrated. Delegate patient seating to a staff member who perceives shade well to get consistently excellent shades.
-
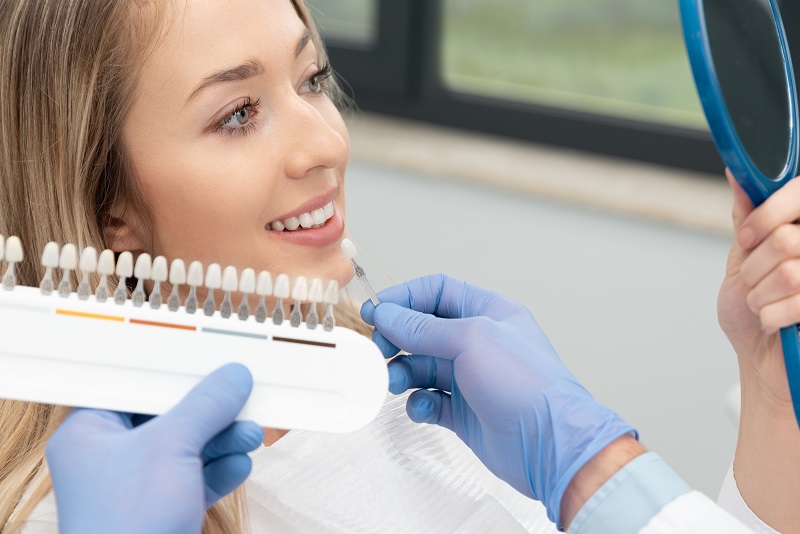
Select tabs by value first
When we talk about color in dentistry, we talk about three components of color: hue, chroma and value. Hue is the name of the color, such as red or blue. Chroma is the intensity of that color. For instance, a pale pink and a brick red might be the same hue, but the brick red has much higher color saturation, so it is high in chroma.
Value is the brightness of the tooth. It is how light or dark a tooth would be if you took a black and white picture of the tooth. Our eyes are three times as sensitive to value as they are to hue/chroma. It is paramount that we select shade tabs with value in mind first because value errors are most notable. Often, when crowns look “fake,” it is a pronounced mismatch in value with the surrounding teeth.
-
Make sure the teeth are clearly in focus
The most important step in getting good shade results from your laboratory is taking good photos. Once you have selected a couple of shade tabs close to the patient’s shade, it is time to take some pictures. Ensure that the patient is seated in a position that allows for adequate light and that lip retraction is used to prevent undue shadowing.
To ensure that your photo shows what you are seeing in the operatory, set the shade tab with its incisal edge aligned with the incisal edge of the tooth to be matched. Then, be sure that shade tab's facial surface and the tooth are in the same plane. If the tab is labial to the tooth, it can appear too bright, and it can seem too dark if it is lingual to the tooth.
If you have a camera with a macro lens, you can often get very close to the tooth and get a good focus. However, many camera phones must be a little further away from the patient to get great focus. Getting the right focus is more important than very close proximity to the tooth when taking photos since the resolution of a modern digital photo will usually allow for digital enlargement. It’s important to retain higher resolution through minimal file compression when sending photos if digital zoom (enlarging the picture) is necessary.
-
Take photos from several angles to prevent flashback
When taking several shade photos, it’s best to change the angle at which the tooth is being photographed. If the camera uses a flash, this will help to avoid having bright spots. Also, since teeth often have features under the enamel’s surface that need to be matched, those features are sometimes only visible from certain angles. Please also provide a full smile photo to show gingival/incisal length and overall tooth arrangement.
-
Send several photos, indicating which ones most closely match the clinical situation
Once all the photos are taken, review them, and determine which ones most closely match the clinical situation. Send several photos, but note which one is closest to what you see clinically. Pay special attention to value and translucency when evaluating photos, as these can be very difficult to capture. It can be convenient to rename the pictures with the information you need to convey, such as “best #8."
-
Validate photos with the patient to ensure customer satisfaction
Once you are done with the photographs, review what you are sending to the lab with the patient. This can have several benefits:
- It is an opportunity to ensure a complete understanding of the patient’s shade expectations.
- The pictures become a tool to share your shade and restorative plan with the patient and get his/her consent.
- The patient can look at his/her dental situation and discuss any additional treatment that might be wanted or needed with you.
Following these shade-taking steps will give your lab the information needed to get predictable shade results for your patients. Your lab can also be a great partner in selecting restorative materials that achieve the best cosmetic and functional result, based upon your photos. If you follow these steps, your patient will often get a great shade result without the inconvenience of an additional appointment for a laboratory custom shade.
Stay at the Forefront of Dentistry With These Tips and Guides
Document Library and Dental/Medical